> ## Documentation Index
> Fetch the complete documentation index at: https://docs.bigdelta.com/llms.txt
> Use this file to discover all available pages before exploring further.
# Records
> Browse, create, filter, and manage your customer records and views.
## What are records?
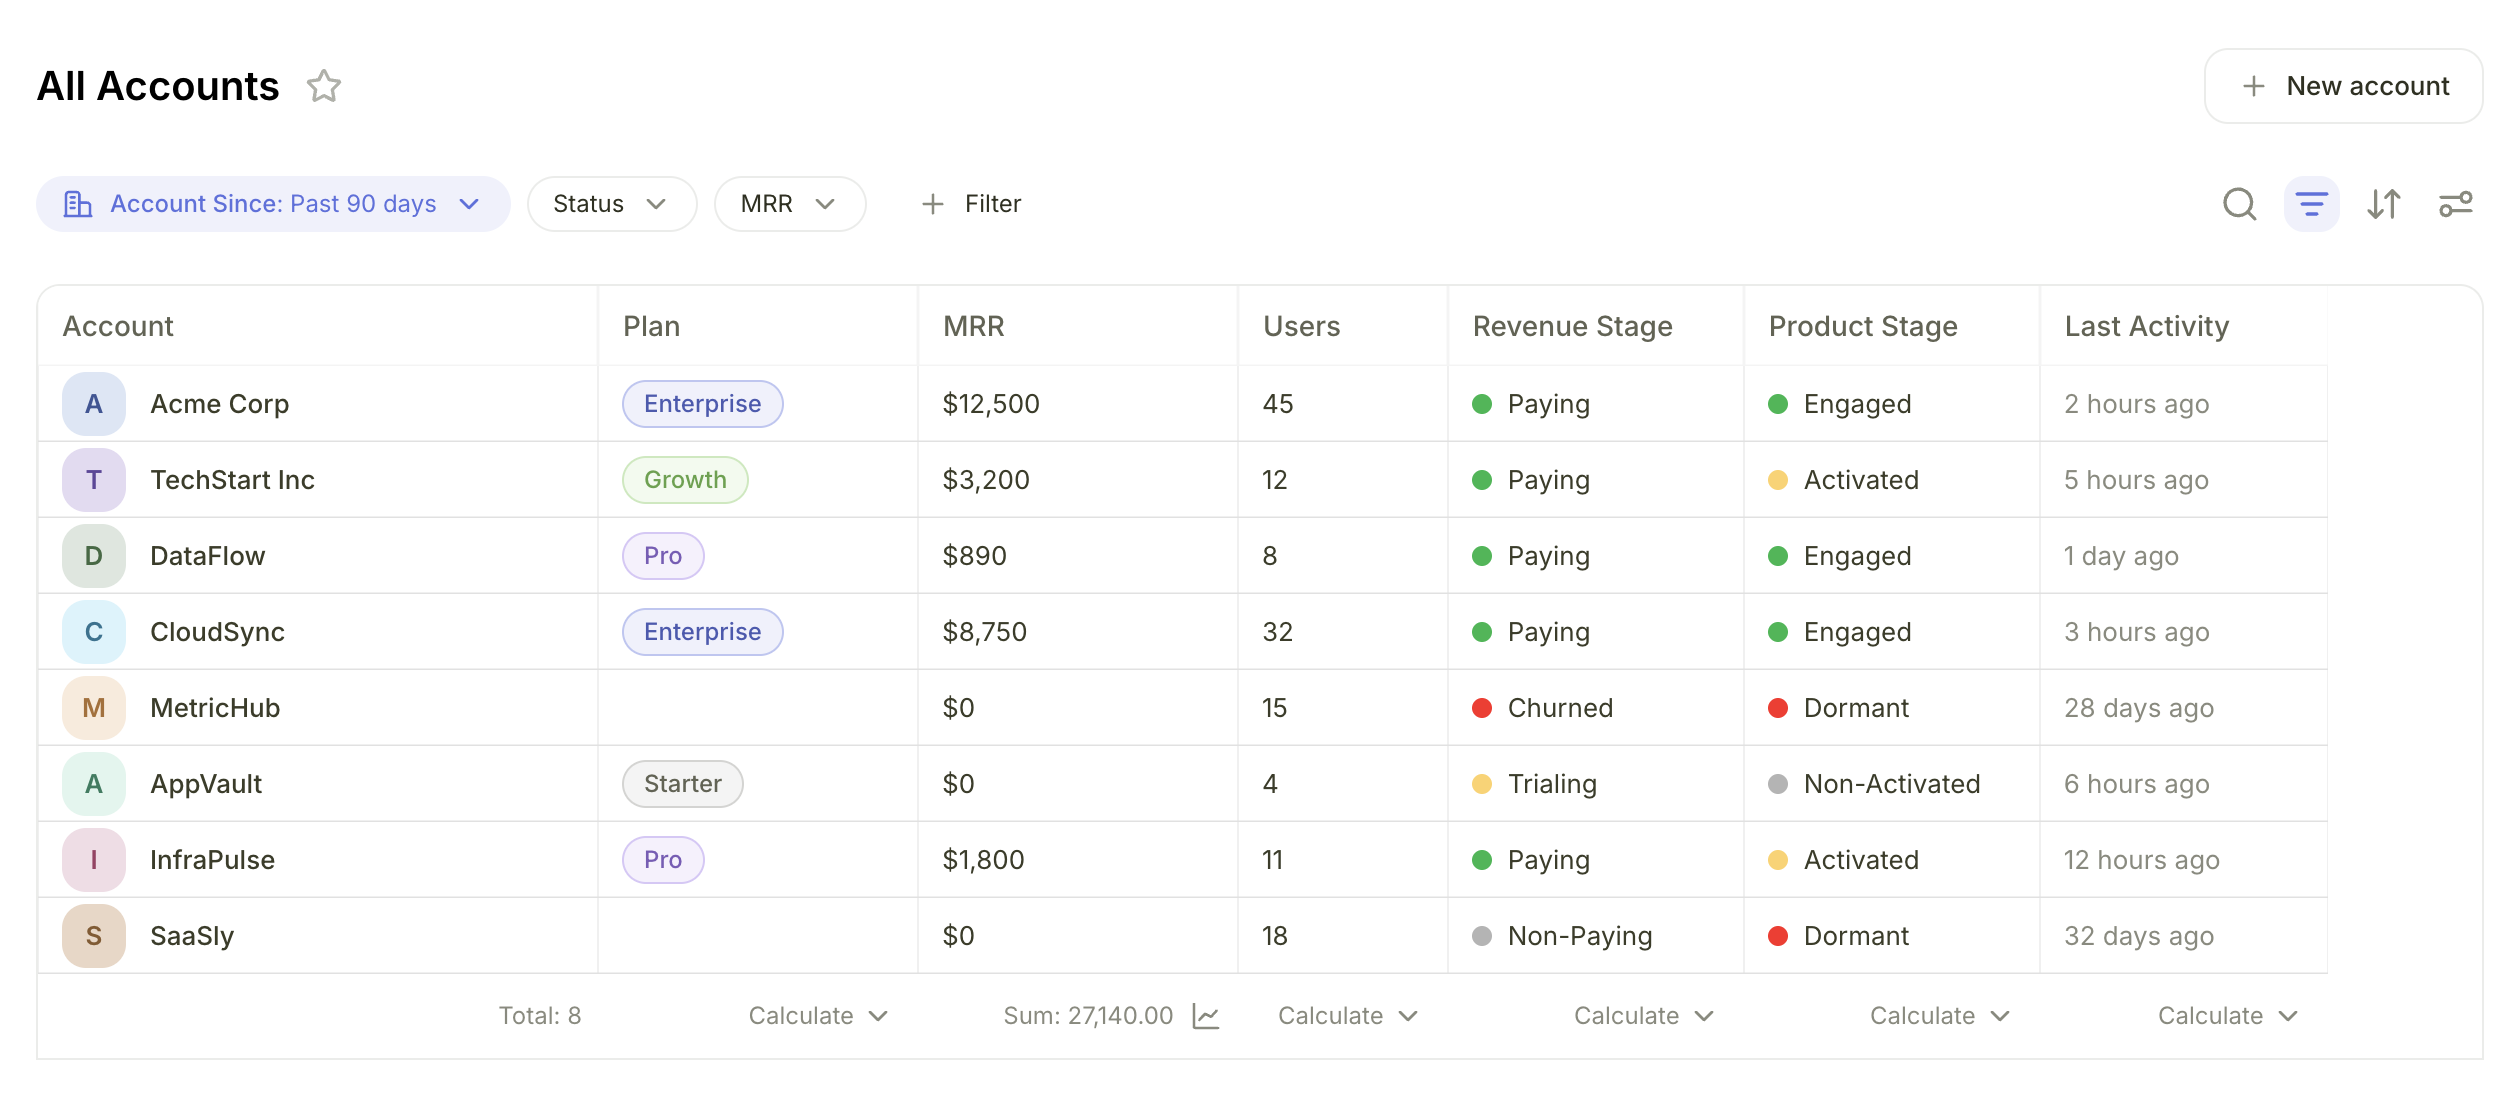 Records are the core data in Bigdelta. They represent the people, companies, and subscriptions you track. Common record types include:
* **Accounts** — Your customers in your product or billing system (primary for revenue tracking)
* **Users** — Individual people within accounts
* **Companies** — Organizations that accounts belong to
* **Subscriptions** — Active subscription records
* **Deals** — Sales opportunities
* **Feedback** — Customer feedback entries
You can also create **custom objects** for any data type unique to your business, giving you flexibility to track whatever matters most.
Each account record is automatically assigned a [Revenue Stage](/guide/features/revenue-stages) (Paying, Trialing, Non-Paying, Churned) based on billing data and a [Product Stage](/guide/features/product-stages) (Engaged, Activated, Non-Activated, Dormant) based on usage data. These stages appear as columns in the accounts list and on individual profiles.
***
## Browsing records
1. Click **Customers** in the top navigation
2. Select an object type from the sidebar (e.g., Accounts, Users)
3. Browse records in the default table view
***
## View types
You can view your records in three different layouts. Use the view selector at the top of the records list to switch between them.
### Table view
A spreadsheet-style grid with sortable columns. This is the default view and works well for scanning large numbers of records.
### Board view
A Kanban-style board organized by a stage property. Drag cards between columns to update their stage. This is ideal for tracking records through a pipeline or workflow.
### Map view
A geographic view for records with location data. Map view is available for Accounts, Users, and Companies. Choose between two visualization styles:
* **Heatmap** — Density-based coloring that highlights concentrations of records
* **Bubble** — Size-based clustering that shows record counts by area
***
## Creating views
You can save different views for the same record type. Each view remembers its own layout, column configuration, filters, and sorting.
1. Configure your preferred layout, filters, and sorting
2. Click the **view name** dropdown
3. Select **Create new view**
4. Name your view and save
Create separate views for different workflows. For example, you might have a "High MRR accounts" view with a revenue filter and an "At-risk accounts" view filtered by churn indicators.
***
## Filtering records
1. Click the **filter** icon above the records list
2. Add filter conditions (e.g., "Industry equals SaaS" or "MRR greater than \$500")
3. Combine multiple filters with **AND** or **OR** logic
4. Filters are saved per view
***
## Sorting records
* In **Table** view, click any column header to sort ascending or descending
* In **Board** view, choose a sort property from the board settings
* Sort settings persist within each view
***
## Searching records
Use the **search bar** above the records list to search across all visible record properties in real time. Results update as you type.
***
## Creating a record
Click the **New \[Record Type]** button (e.g., "New Account") at the top of the records list.
Complete the required fields in the creation form.
Your new record is saved and added to the list.
Enable the **Create more** toggle to keep the creation form open after saving. This is useful when you need to add multiple records in a row.
***
## Exporting records
1. Open any records list view
2. Click the **Export** button
3. Choose **Excel (.xlsx)** or **CSV**
4. The file downloads automatically with a timestamped filename
The export includes all visible columns and respects your current filters and sorting. Adjust your view before exporting to control what gets included.
***
## Deleting records
1. In the records list, select one or more records using the checkboxes
2. Click the **Delete** button
3. Confirm the deletion
You can select multiple records for bulk deletion.
Deleting records is permanent and cannot be undone. Make sure you have selected the correct records before confirming.
***
## Board view actions
When using Board view, you have several additional actions available:
* **Drag cards** between columns to update the stage property
* **Reorder columns** by dragging column headers
* **Hide or show columns** from the board settings menu
* **Customize card details** to show specific properties on each card
Records are the core data in Bigdelta. They represent the people, companies, and subscriptions you track. Common record types include:
* **Accounts** — Your customers in your product or billing system (primary for revenue tracking)
* **Users** — Individual people within accounts
* **Companies** — Organizations that accounts belong to
* **Subscriptions** — Active subscription records
* **Deals** — Sales opportunities
* **Feedback** — Customer feedback entries
You can also create **custom objects** for any data type unique to your business, giving you flexibility to track whatever matters most.
Each account record is automatically assigned a [Revenue Stage](/guide/features/revenue-stages) (Paying, Trialing, Non-Paying, Churned) based on billing data and a [Product Stage](/guide/features/product-stages) (Engaged, Activated, Non-Activated, Dormant) based on usage data. These stages appear as columns in the accounts list and on individual profiles.
***
## Browsing records
1. Click **Customers** in the top navigation
2. Select an object type from the sidebar (e.g., Accounts, Users)
3. Browse records in the default table view
***
## View types
You can view your records in three different layouts. Use the view selector at the top of the records list to switch between them.
### Table view
A spreadsheet-style grid with sortable columns. This is the default view and works well for scanning large numbers of records.
### Board view
A Kanban-style board organized by a stage property. Drag cards between columns to update their stage. This is ideal for tracking records through a pipeline or workflow.
### Map view
A geographic view for records with location data. Map view is available for Accounts, Users, and Companies. Choose between two visualization styles:
* **Heatmap** — Density-based coloring that highlights concentrations of records
* **Bubble** — Size-based clustering that shows record counts by area
***
## Creating views
You can save different views for the same record type. Each view remembers its own layout, column configuration, filters, and sorting.
1. Configure your preferred layout, filters, and sorting
2. Click the **view name** dropdown
3. Select **Create new view**
4. Name your view and save
Create separate views for different workflows. For example, you might have a "High MRR accounts" view with a revenue filter and an "At-risk accounts" view filtered by churn indicators.
***
## Filtering records
1. Click the **filter** icon above the records list
2. Add filter conditions (e.g., "Industry equals SaaS" or "MRR greater than \$500")
3. Combine multiple filters with **AND** or **OR** logic
4. Filters are saved per view
***
## Sorting records
* In **Table** view, click any column header to sort ascending or descending
* In **Board** view, choose a sort property from the board settings
* Sort settings persist within each view
***
## Searching records
Use the **search bar** above the records list to search across all visible record properties in real time. Results update as you type.
***
## Creating a record
Click the **New \[Record Type]** button (e.g., "New Account") at the top of the records list.
Complete the required fields in the creation form.
Your new record is saved and added to the list.
Enable the **Create more** toggle to keep the creation form open after saving. This is useful when you need to add multiple records in a row.
***
## Exporting records
1. Open any records list view
2. Click the **Export** button
3. Choose **Excel (.xlsx)** or **CSV**
4. The file downloads automatically with a timestamped filename
The export includes all visible columns and respects your current filters and sorting. Adjust your view before exporting to control what gets included.
***
## Deleting records
1. In the records list, select one or more records using the checkboxes
2. Click the **Delete** button
3. Confirm the deletion
You can select multiple records for bulk deletion.
Deleting records is permanent and cannot be undone. Make sure you have selected the correct records before confirming.
***
## Board view actions
When using Board view, you have several additional actions available:
* **Drag cards** between columns to update the stage property
* **Reorder columns** by dragging column headers
* **Hide or show columns** from the board settings menu
* **Customize card details** to show specific properties on each card